Friday, December 31, 2010

A Kitten Christmas, Finished Projects and Learning a New Technique

Christmas is over and we're in the quiet week between Christmas and New Years. This year has been one of making new traditions and temporarily setting old ones aside.  Because we have two kittens in residence, putting the delicate blown glass ornaments on the tree wasn't an option.  This is the first year in many, many years that I haven't been able to put my beloved ornaments on the tree, nor could I use the new ones I bought earlier this year.  Ah well, there's always next year! We opted for a (shudder!) artificial tree this year, decorated with large bows and unbreakable gold ornaments.  The kittens regarded the tree from the beginning as their playground and have spent quite a bit of time up in the branches.  They've knocked off ornaments and bows. But they're so darn cute that we couldn't get angry with them.
Myst in the Tree
See what I mean?

We did add two new traditions to the mix.  I've always loved the tradition of putting candles in the windows at Christmas.  Several years ago I visited Frederick, Maryland at Christmastime. I finished my work early and took the opportunity to visit the historic district. For December, the weather was mild and the walking tour was fun. Several of the oldest houses had the candles in the windows.  Beautiful!  Just before Christmas, I found some battery-powered LED candles that come with suction cups.  They can sit on the bottom window frame and hold on to the window.  They're wonderful!  They also flicker, so they look a bit spastic, but I love them.  I also love that they have embedded timers, so they turn themselves on and off autmatically.

Byzantine ATC's for the Tree


I was bemoaning the no-delicate-ornament situation to my son who replied that since we're artists, we'll think of something.  And he was right. I decided to start a tradition of making a few ATC's for the tree. Friends can have one... but only if they bring one for trade! Thus far, it was a bust. Joseph was going to make some, but he didn't get around to it. Mom opted out this year. But I made five more Byzantine cards for the Christmas tree and they looked lovely... when they weren't being knocked off the tree.  But they survived.  At least four of them did. I assume I'll find the fifth one when we take the tree down.


Finished Projects
I managed to finish several projects.  Obviously I have oodles more to go, but I'm happy for what I've gotten done.

George's Fingerless Gloves
Well, I didn't make it by Christmas, but I only missed it by one day.  I finished the gloves on the 26th and cast on for the caps the same day.  But at least these are wearable... just in time for the weather to warm up.  Ah well. There's plenty of time for it to get cold again.

The Aran Sweater
The Aran Sweater
And not that I want to suggest that the world might be coming to an end or anything, but I finally finished the Aran sweater!  It's been on the needles for years.  It's finally off the needles!  Finishing it was a pain, but I'm so glad I can finally wear it... just in time for the weather to warm up!  It's very warm and snuggly.

I steam-blocked the seams and cables.  This is the first time I've had the courage to try steam-blocking.  I like it very much for thicker things like sweaters.  Probably fine lace will still be damp-blocked.  If I do much more steam-blocking I'm going to need a garment steamer, but the steam iron does nicely for now.

ATC's and Encaustic
Again, I've been putting off doing January's ATC's.  It's not so much being stubborn as being very busy. 
January's themes are "Inspired by Color" and "Make Your Own Background."  Weeellll.... I frequently make my own backgrounds these days.  I'm getting more comfortable with acrylic paints and am rather enjoying them.  But I've been tempted by encaustics.  Encaustic is an ancient Greek style of painting.  Ground pigments are mixed with beeswax and damar resin.  The paint must be worked  hot, but when it cools, it's very tough. I've put off and put off buying some starter paints and tools and getting going with it.  But George gave me some paints and tools for Christmas, so my excuses are running thin. So yesterday, I plugged in the hot plate, melted paint in an old muffin tin and got out the natural-bristle brushes.  Eight cards later, I at least had the theme done!
Encaustic Village Group
I did these on a sticky-back canvas card, which I probably won't do again.  Next time I think I'll try watercolor paper cards.  But these worked.  The background was done in white, cobalt blue, and an ochre color I made with cadmium yellow and a dark brown.  (Didn't have yellow ochre paint.) The village scene was torn from a cocktail napkin and embedded in the wax. I made every beginner's mistake in the book, but I'm kind of excited about it.  It's far more time-consuming than acrylic or even watercolor, but it has its compensations. The smell of the beeswax is lovely!  None of the cards is a miracle of technical perfection, but they all have a charm of their own.

Encaustic Village Detail

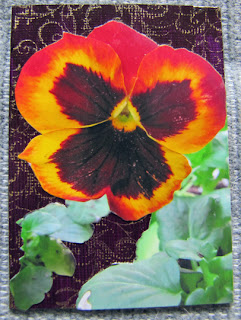
"There's pansies, that's for thoughts."

Inspired by Color has been fun.  With the weather overcast and as gloomy as it sometimes gets around here, I've been longing for color.  Pansies are a cheerful flower that can tolerate the cold.  So we bought lots of pansies when we bought the window candles.  I planted them in windowboxes and set them on the walkway.  I also put some in the "kitten pot" - the flowerpot that the kittens slept in when they were tugging on our heartstrings and finding themselves a home.  I bought as many different colors as I could.  I love them all, but my favorite is a "monkey-face" large pansy with a brown-ish purple center surrounded by gold and red.  I like to think this card is a mixed-media project of gardening, photography, acrylic painting and stamping!

Another Year
So what will next year bring? More learning techniques in all media. More weaving. I love to weave, but I don't get around to it all that often. George is about to finish the antique Sabina loom and I'm excited about getting a shawl woven on it. I have all kinds of things I want to do in 2011. I want to get this weight off. It's affecting my health and that's not good. I want to spend more time outdoors and on the boat. We'll see what comes my way! A very happy and productive New Year to all my friends and family and to those that may read this blog, but who I never know or meet!

Monday, December 6, 2010

The ATC's That Won't

Byzantine Retro
Some days it's just not worth getting up in the morning.  I'm only participating in one ATC swap this month: Retro Christmas.  I thought about making a 50's-looking card, but an icon I found called out to me.  I decided to go for a Byzantine look. I wanted the card to appear old with the paint somewhat peeling, so I decided to use Tim Holtz's crackle paint.  This is the first time I've used crackle paint.  What I don't know about crackle paint would fill volumes, apparently.  Here are the steps I used to make the cards:
  1. Paint an acrylic canvas ATC with gold arcylic paint. Let dry.
  2. Glue on the icon image. Let it dry.
  3. Gold leaf the halos around each member of the Holy Family. Let it dry.
  4. Apply clear crackle paint and let it dry.
  5. Panic
Maybe I read the instructions wrong, but they said to apply a thick coat of crackle paint. For reasons unknown to me, the crackle paint cracked all right, and lifted the ink off the icon image with it. In areas where I used little paint, the cracking is really pretty.  That would be one or two of the cards.  The rest cracked way too much, varying from a little too much to "I can rub the entire image off the card" too much.  Lesson learned: Use crackle paint sparingly, at least over a printed image.  I need further experimentation to see just how it works with various media.

I intended to varnish the cards anyway to protect them, but this morning it became a "glue the 'paint chips' back on" exercise. After two coats of varnish, gluing chips back on where necessary and possible, I think I have 9 finished cards.  I won't say they're all good.  Far from it!  But they're passable, if somewhat delicate.
Byzantine Retro ATC card detail

Phinished Phiberwork Projects
I've finished quite a few knitting projects, and one crochet project that I'm very happy about.  I've hated crochet for years.  It makes my hands sore and my gauge is a nightmare.  Working at the shop, however, has been a wonderful thing.  Crochet designer, Linda Permann works there.  Although we usually trade days - I'm there when she isn't - she and I found ourselves working together for a week.  During that week, not only did she take the time to correct many of my mistakes, she helped me find patterns and yarns.  In some ways, I now like crocheting better than knitting.  I can design as I go more easily in crocheting than knitting.  No, I'm not abandoning knitting, nor can I ever see myself doing so, but I'm getting to really like crocheting.  So without further ado, here is my first post-Linda project, the Cardiff Cowl from Lion Brand Yarns.

Cardiff Cowl Detail
The pattern is reasonably easy, very pretty and only took one skein of Mirasol Nuna.  I bought two skeins, thinking I'd need both.  The cowl came in a few yards under a single skein.  I decided to make a knitted cowl from the second skein.  George found me a lovely feather-and-fan (Old Shale, Print o' the Wave) and cabled pattern, so that's what I used.  And here it is!

Feather Cabled Cowl

And fresh from the needles of a girl who hates doing colorwork, here are two versions of the Argyle hat from Crystal Palace yarns.  Both are made with a solid color of Merino 5 and a handpaint in Mochi Plus.  The first is my hat with the variegated on cream.

My Argyle hat

The second is a more intense rainbow yarn against black.  Honestly, I like this one even better than the first one.  However, I promised this hat to George and he won't give it back!

George's Argyle Hat

More Projects??

But I have to start more socks, don't I?? I think I only have five pairs going just now. Here are the latest, a simple sock made to show off the Footprints yarns I have. The set includes handpaint yarn for the body of the sock and a smaller amount of a coordinating tonal yarn for the toes and heels. I'm hoping I'll have enought for the cuff at the top of the sock. I'm using the Upstream master pattern from Cat Bordhi's New Pathways book.

And last, but not least, I've started a pair of fingerless mitts for George.  These will have detachable covers for his fingers so he can choose whether to have more dexterity, but colder fingers or warm fingers and less dexterity.  I just cast these on yesterday, so they're not far along yet.

George's Fingerless Mitts
It's been a busy time! Of course, there's much more going on, but this is a start.  One of these days, I'll get this blogging thing working better and post less in one post, but more frequent posts.  Someday...

Tuesday, November 2, 2010

New ATC's

Ah, it's ATC (Artist Trading Card) time in the ol' town tonight.  I squeaked these in under the wire.  What with the polymer clay shrines, working at the yarn shop, designing knitted stuff and everything else in my life, I put off making the cards until the weekend before the swap.  Oops!

Actually, I'm glad I did.  The themes this month were Flying Things and Steampunk.  This time, I thought they'd both be easy.  Wrong!  But... Last week I had a chance to attend a class taught by Susan Pickering Rothamel.  She used techniques and media that I've never worked with before and was, frankly, a little scared to try. When I got home, I wanted to practice the techniques before I had a chance to forget, but the two kittens decided to join us that evening and the studio had to wait. I had to work Saturday, but on Sunday, I took my courage firmly in hand and decided to tackle a technique I'd never tried before to produce seven Flying Things ATC's.  I've never been known for sense.

And here they are!

Leaves Fly, Too
 Each is a little different.  They're each based around a Japanese postage stamp with a bird (flying thing) on it. Because I love this time of year, I wanted to use fall themes and colors.  So...  I started with an acrylic underpainting in fall colors. I adhered the postage stamp to the middle of the card and a black-paper cutout of tree branches on top.  Then I adhered maple leaf motfs from paper napkins and overpainted them with acrylics. After the whole thing dried, I embellished the leaves with irridescent paints.  A coat of sealer and they were done!  Here is a detail of one of my favorites:

Leaves Fly, Too Detail
The Steampunk card should have been easy.  I have two kids who thoroughly understand Steampunk.  I did a memory book for my son that was totally Steampunk.  I get this concept.  And maybe I'm getting a little tired of it.  But a thought kept niggling at me.  How about a totally Steampunk card, complete with a mechanized view of life, with a little bit of color and nature and light?  So I took a stamp I dearly love, a woman made of clock faces, found two Steampunk backgrounds, and found a gorgeous butterfly from a Dover clipart book.  I stamped the woman onto a shaded, almost flesh-toned paper and embossed her in black to create a sharp, almost harsh image. I cut the image out and adhered it to a dark, paper printed with gears and all that Steampunk sort of stuff and then adhered the butterfly to the card.  I embellished the butterfly with irridescent paints and tiny crystals.  And here it is:
Juxtaposition
I have to say, I'm glad I did the swap.  The one thing about scheduled ATC swaps, it forces me to create art on a schedule.  Now that may seem kind of mechanized and soulless, but let's face it, if Pope Whichever hadn't kept on his case, Michelangelo probably would never have finished the Sistine Chapel!

Sunday, October 31, 2010

New Kitties!

Calliope and Myst

Myst Gives Calliope a Wash
We've been adopted!  Last week I saw three kittens on the deck.  Two were calicos and one was grey and white.  When I went out to investigate further, I saw a large calico cat run off the deck.  The darker calico tried to follow, but the mama (so I assume) swatted her away. One calico was darker, one was mixed with white like the mama and I couldn't determine whether the grey and white cat was male or female  He/she was the shyest of the three. 

Against my better judgement, I brought the kittens some dry food.  They ate it down like they were starving.  After their meal, they scampered off the deck and disappeared.  I assumed they were littermates and the large calico was their mother.  I'd never seen the mama or babies before, which means absolutely nothing.  There is another neighborhood bordering ours and a certain amount of undeveloped area, so animals come and go.  I was concerned for the kitties, though.  There is a busy street bordering our neighborhood and quite a variety of predators around, including red-tail hawks. Although our neighborhood is quiet, the area isn't all that safe for young animals.

That night, I peeked out on the deck and there were the kittens, curled up in an empty plant pot on the deck table.  I left them to sleep.  The next morning I looked out and they had already gone.  But that night they were back again.  Or so I thought.  I took them more food and discovered that only the darker calico and the grey and white were in the bowl.  I haven't seen the lighter calico since the first day nor have I seen the mama cat.  We decided to take the two kittens in, but keep them in solitary confinement until we knew more about them.  We discussed taking them to SCAT - the local cat rescue association, but I just couldn't do it.

We took them to the vet Friday morning and had them checked over.  They each received a clean bill of health and got their first round of vaccinations.  We brought them home and introduced them to Ming.  He's not all that pleased, but there's been a remarkable absence of hissing and spitting.

After a family discussion - that being two hours on the phone with my daughter at college - we named the calico Calliope and the grey and white kitty Myst.  Calliope is Greek for "beautiful voice" and it fits her. She talks more and louder than our resident Siamese!  Calliope was also Homer's muse for the Odyssey.  Myst fits the grey and white kitty as she's a little more retiring and slips in and out like a mist.

So Myst and Calliope have joined Ming Miao as the resident rulers of the household.  For the most part, they're getting along.  Ming is just beginning to think about playing with the interlopers.  At least he hasn't attacked them!
And I did manage to get two Cat Nap Mats crocheted for them!

Wednesday, October 27, 2010

Finished Socks, Started Socks

George's Philosopher's House Socks

George's Philospher's House Socks - Take 2
I finally finished the second version of Cat Bordhi's Philosopher's House socks for George.  He went through the first pair I made for him in about a week, so I repurposed a semi-felted aran-weight yarn into replacements.  The yarn was a bit too thick and stiff to work on size 5 needles, but I did it anyway.  The yardage was a bit short for the complete cuff, so these are about six rows too short.  However, they fit and George loves them and that's all that counts!  I have two more skeins that could become socks for him as well, but it might be awhile before I tackle that yarn again!

Quiet Evening Socks


Quiet Evening Socks - in progress
 I'm sure there's some reason why I need to cast on a pair of socks as soon as I finish another pair.  Even though I have plenty of other work on the needles, I just seem to have this insane drive to KNIT!  These socks were in the latest issue of Creative Knitting.  It's not like I need another sock pattern or a lesson on knitting toe-up.  I've been doing that for quite some while now.  And I'm going to change this pattern anyway and use one of Cat Bordhi's arch expansion / heel choices.  But there's something about the colors and the name.  It reminds me of Carly Simon's song of the same name.  This is a simple lace pattern that's easy to remember and rhythmic to knit.

Back to the Artist Trading Cards
Maybe I'm knitting to avoid making the next round of ATC's that's due next week.  I can't figure out how to do what I want to do and it's frustrating me.  I've noticed a strong tendency to do something else when I don't want to do what I know I should do!  So I'd better get busy and do what I know I should.  It'll make me much happier.

Tuesday, October 12, 2010

Finished Dia de los Muertos and Survived Yarn Crawl

Hill Country Yarn Crawl 2010
Well, it's been busy around here!  The 2010 Hill Country Yarn Crawl crawled its way through the Columbus Day weekend.  For someone with no retail experience, an event like the Yarn Crawl is an eye-opener.  It was busy.  It was crazy.  It was exhausting.  And for the most part, it was fun. My favorite part was acquiring a cocobolo Turkish spindle from a "crawler" who has just started making them.  She's quite an artist and I joyfully bought one of her samples. The next day, I brought it with me to the shop to give it the acid test.  I'm pleased to report that it's a delightful companion while walking around the store helping customers find their yarn.


Dia de los Muertos 2010

Dia de los Muertos 2010
And after a major push last night, Dia de los Muertos is finished.  I love seeing the differences between how I think a piece will be when I start and how it actually turns out when it's finished.  I planned on using yellows, oranges, reds, and magentas with black.  I made my first flower cane - yellow and orange marigolds.  I made a few tiles in magenta clay with calaveras (skulls) set in them.  And then the piece decided to be different.  I wanted to have an image of the Virgin of Guadalupe, so I located a source for the images. While I was researching her and making the image tiles, I noticed that her robe is almost a turquoise blue with gold stars.  And then it clicked and the piece went from bright, warm colors to blues, greens, purples and turquoises. The last space, above the blue tile with the red moon on the left, refused to accept anything.  Everything I tried looked wrong.  I've learned to trust that when that happens, there's something that wants to be there and if I listen, it will tell me.  So I listened and in hopped one of the marigold cane slices.  So one of them did get to be on the piece after all!  This morning I glued it down and found a green glass leaf bead to go with it.

I've also re-learned to trust the creative process.  There's a frustrating point at which the piece just will not work.  I've quit the process many times in the past when I've reached this point.  It doesn't seem to matter whether the piece is polymer clay mosaic icons, term papers for school, paintings, costume designs or music compositions.  I always get to this point.  From talking with other artists, I believe it's a universal experience. But, if I keep with it, this frustrating point is always the turning point and then the piece resolves and does so relatively quickly.  It always amazes me.  Attempting to analyze it, I think that point is the breaking point from where I thought the piece was going at the beginning and how the design is actually turning out.  Sometimes the end result is very similar to the original concept, but sometimes it's almost unrecognizable.  But the important thing is to always trust the process and stick with it.

Wednesday, September 29, 2010

Leonardo is Done! And Another Scarf is Started

Homage to Leonardo

Yea! After what seems like forever, the Homage to Leonardo mosaicon is finished!  I'm very pleased with it. It turned out to be a tour de force of technique. Most of the tiles are done in Premo clay, stamped and highlighted with mica powser - Pearl Ex Sunset Gold, to be precise. Many are beaded, which is always fun. Some are done in Sculpey Original in terra cotta and highlighted.  Some are done in the terra cotta and painted with Venetian Gold paint. The frame and some of the tiles are done in Premo copper, stamped and highlighted.  Two are image transfers of Leonardo da Vinci's work.  One is of his self-portrait and the other of the Madonna of the Yarnwinder (see below). Two are done in Premo gold, mica shift technique with a stamp. I carefully shaved away the raised part of the pattern.  The crown was tonight's learning experience - chatoyant in gold Premo. I did a snail shell and shaved thin bits from the shell.  Then I layered them onto a base rectangle of gold clay and rolled them in. Lastly, I cut the rectangle into the crown shape and baked it. Tonight, this is my favorite tile.


Stones and Waves Narrow Scarf
And I started yet another scarf.  This is strange for someone who hasn't much worn scarves. But the yarn for this one just called to me.  The green is Frabjeous Fiber's Banana Silk in a lucious green the turquoise is Mango Moon's Chakra in Turquoise.  This is the scarf I wish I'd made before!

Yesterday was emotionally trying.  I discovered what it's like to be involved in a campus shooting. Neither I nor anybody I'm close to was immediately involved, but being there and being present was difficult. Giving what help and support I could via text message... well... it works.  I'm amazed at the technology and how it helps.  I do want to thank the University police and city police as well as the other agencies involved for responding so quickly and keeping the other kids safe. I cry when I think of the young man who saw no other way out than to end his life in that dramatic fashion.  Where have we failed him?  If it truly does take a village to raise a child, how did the village fail him? I cannot imagine the agony of his parents now. There can be nothing worse than losing a child.  Within a month I've seen two mothers lose their children and a woman lose her husband. There is no answer to why, I don't think. There is only the lesson to value what we have when we have it and give thanks every minute while our loved ones are with us.  That was the lesson I took away from the Columbine shootings and it's only been reinforced with recent events.

Thursday, September 23, 2010

More Mosaicons

After completing the anniversary mosaicon, I decided to start on one for myself. Two ideas were in hot competition with neither one willing to give way to the other.  So in my usual over-the-top fashion, I decided to do them both.  The first is a piece based on Leonardo da Vinci's Study for Leda and the Swan. The most complete drawing, which wasn't used in the study for the finished piece, is one of my favorites of all his known work. Fortunately, it's in the Dover daVinci collection, so I was able to use it as the focal point of this piece.  It doesn't hurt that I'm reading Fritjof Capra's The Science of Leonardo. The book is probably not Capra's best work, but I'm learning about da Vinci, and that's a good thing.


Homage to Leonardo
I've chosen to limit the palette for this piece to terra cotta and gold.  Because da Vinci frequently drew in red chalk, I thought the terra cotta would be a good choice. I have a stamp of a drawing and notes from his notebooks.  I made a mold of it so the writing and drawing would be raised.  In retrospect, I'm going to try doing a straight stamp and see how that looks.

I also tried doing a print transfer to tile.  Overall, it works pretty well, with a few surprises.  I think I'm just not master of the technique yet.  One of the transfers is of da Vinci's self-portrait.  The other is a detail from my favorite of his finished works, The Madonna of the Yarnwinder - or as I disrespectfully term it, the Niddy-Noddy Madonna.  I tried transferring both to terra cotta tiles.  They both worked fine, but I'm not satisfied with the colors.  Next up was transferring to white tiles.  Better, and I may use these.  But I'm going to try transferring to pearlized tiles.  Comparison photos I've seen show this as the best way to do it.


My First Cane
And I made my first cane for this piece!  Laurie Mika doesn't mention making canes in her book, although I suspect she may do so.  I wasn't all that gaga about the idea at first, but I can see where they open up possibilities that can't be done any other way.  Today's project was making pearl and gold checkerboard tiles for the da Vinci project.  They're not perfectly even and straight, but I love 'em anyway!


The Huntress
The next piece is based on an image I adore - Diana using the crescent moon as her bow. It's my favorite image from Disney's Fantasia and I was so lucky to find a similar image in some ephemera I recently acquired. In the process of researching the Goddess and the image, I discovered that Disney issued a pin of her in March.  I couldn't get the pin directly from them, but I did win one on e-Bay, the arrival of which I'm eagerly anticipating.

The ideas for the tiles haven't come quite so fast on this piece - or rather, I've had setbacks on this one that have slowed me down.  The large frame that goes around the recessed image was done in blue clay with the inner part highlighted in silver and the outside highlighted in gold.  I made a first version along with two random tiles and baked them as I always have.  They came out black.  The only thing I can think of is that I burned the clay.  I was so disappointed I almost quit.  But I tried a second time and it came out right, which reinforces my belief that I overcooked the original set.  Thus far, my favorite bit was using a small face mold I have to make a full moon from pearl clay.  I highlighted the eyes and lips with interference gold, which came out better than I dared hope. I'll get back to this one soon.

Thursday, September 16, 2010

Mosaics and Icons - Always and Forever

Always and Forever

Yesterday I finished my first mosaic icon - or "mosaicon," as Laurie Mika terms it in her book. I set out to make the icon as an anniversary present for a friend and her husband. They had only been married a short time when he was diagnosed with advanced cancer. I started on the icon knowing he was dying, but hoping I could finish it in time for him to see it.  I didn't make it, as he died last week.  It should get there in time for his memorial service.

A little over half the tiles in the piece were hand made in polymer clay.  The milagros in the tiles were purchased at our local market as was the Sacred Heart piece at the top and the large painted tile at the bottom. Many of the tiles are representational.  One was made after being told a story about his last days.

The rose pictured in the center of the piece is a Photoshop Wonder. I didn't want the photo around which the piece is built to be seen publically.

As difficult as this piece was to make, and it was, I adore this art form. I was crazy for making my first piece in an unknown medium as a gift for someone in a difficult time.  It kind of ups the ante, as it were. But difficult as it was, if it gives any sort of meaning or peace, then I've accomplished what I set out to do.

Now the this piece is finished I'm looking forward to the next one. In the next month or so, I need to do a piece for Dia de los Muertos (Day of the Dead).  Our store here will display the pieces and I'd like to participate. Before then, I'm up between a piece honoring Artemis and one centered around Leonardo da Vinci's Study for Leda and the Swan.  I'm further down the road on the da Vinci piece as I have some terra cotta and gold tiles finished. We'll just have to see what happens next!

Tuesday, September 14, 2010

Adding Art

Okay, so maybe I've regressed to childhood.  I play with dolls.  I've re-discovered the joys of cutting paper apart and pasting it back together.  And why do we ever stop making mud-pies??  Oh, the beauty of trading cards!  In other words, I've found a way to sneak up on the visual arts and am having the most fun. Mostly.

It all really started last spring with the graduation scrapbook for my youngest. Said scrapbook still isn't made, of course, but that's where it started. For reasons I can't even remember, I decided to wander into the local rubber stamp store. They had just moved to their new location and weren't totally set up for business, but off in a corner was a sample book made of 4" by 4" coasters and mixed media.  Beside the sample were kits for the book. I fell in love, snatched up one of the kits and headed for the cash register. I was somewhat discouraged from buying the kit as it had been a class kit and the class was long past. Nobody in the store knew how to make it up.  So I bought it anyway.  For several weeks I'd pull it out, spread the contents over my desk, look at it, get overwhelmed and put it away.  Then I finally started work. Oh, I did it my way... which means I mis-read the instructions and did a page or two in a way that made sense to me. These are some of my favorite pages, needless to say. I had to learn to emboss metal, dye it with alcohol inks. paint on paper with alcohol inks and distress / age photos and papers. And I began my battle with adhesives.

It was easier in kindergarten. You used Elmer's school paste and that was that.  Now there's a bewildering array of glues, pastes, tape runners, etc. just waiting to... ahem... entrap the unwary. For scrapbooking, I prefer a repositionable tape runner. So heading off to mixed media, I simply bought the permanent version of the same thing. Sigh. There's sticky and then there's hopelessly stuck.  Zero open time, zip repositionablity and the dispenser gunks up hopelessly slightly before the end of the tape roll. It's one of the few things I'll allow my husband to clean - he whose first level cleaner of choice is rubbing alcohol. And then when you think it's stuck, you're stuck with corners that come unstuck.  Liquid glues cause paper to buckle and curl. Pastes remind me of kindergarten. Glue sticks don't stick. What's a girl to do? I did eventually find an answer - YES! paste, slightly doctored.

Then there are cutters.  Did you know it's impossible to find a cutter that actually cuts at perfect right angles? Which reminds me of my brother's lack of concern with level. How can something be level when you're standing on a ball? Probably the same thing with right-angle cutters. I did find the perfect pair of scissors - the "remove 'em from my art table and die" scissors. Add an Xacto knife, clay blade, dull table knife and you're probably there.

Anyway, after trial, tribulation, and lots of fun, I completed the book - Divas from Gecko Galz. And fell in love. While working on that book, I came up with ideas for five or six more, one of which I made and others still waiting in the wings. Up next was a book celebrating two decades of friendship - a gift to my best friend.

Friends

I collected friendship quotes from the internet and raided my stash for images of friends. The book took a while to come together, but not terribly long.  As usual, if I had it to do over, I would have done some things differently.  If that ever changes, I'll stop making things. It was a wildly successful gift, for which I'm grateful and should hopefully be featured in a technique book somewhere down the line.

The Birthday Book

Next up was a book celebrating my son's 23rd birthday. This was an exercise in Steampunk, something I'm really getting to enjoy. I collected images of him through his life doing Steampunk-y things - his early infatuation with trains, his "magic show" at the Hotel del Coronado in San Diego, his animated "float" for the shoebox Fiesta parade. It was such fun giving him both this book and my husband's Steampunk Birthday Card - weighing in at five pounds made of metal, gears, pipes, gauges and valves.  Did I mention SuperGlue and epoxy are his adhesives of choice? That and welding...

During one of my many visits to Stamp Antonio, I noticed two things that grabbed me. One was a display advertising an upcoming class, the other was the flyer announcing the themes for the ATC group. First I had to learn what an ATC was. Enter, stage left, the return of trading cards!  Artist Trading Cards (ATC's) are trading card-size pieces of artwork intended to be traded, never sold, and to convey something of an artist's style. They can be traded for the joy of it, or can be used as business cards. I casually mentioned that I might like to participate some time and, wham!  I found myself signed up for September's swap, both themes.

So to get started, I made my son an ATC to tuck into a pocket I hadn't realized needed to be in his book. That went okay, so I decided to stay signed up for both ATC themes.  The first was Black and White, a theme I almost dropped out of.  The second was Ancient Civilizations and Cultures.  I thought number 2 would be a shoe-in.  Silly me.  The Black-and-White idea came easily, although the execution took a bit of trial and error. Maybe what helped was a rant to my daughter by her father. His typical theme when running me down is "black is black and white is white and right is right and wrong is wrong."  Black is black and white is white, eh?  Don't we all wish life were that simple. So what are they... and here came a thought from a long-forgotten and not-loved philosophy class... but points on a continuum?  Hmm...  So I incorporated that idea, chess, and the yin/yang symbol and here we are:

Points on a Continuum

The Ancient Civ theme took forever, but it finally came, too. Ancient Greece?  Rome??  Egypt?  In the total history of the human race, they're yesterday. I thought of the stories I've told and how the same stories appear across cultures.  Where did they come from? Tales around a campfire? I think reading Gene Kranz's Failure Is Not An Option may have gotten me thinking about the stars and the stories people tell. Did you know Orion is the oldest recorded constellation in its current configuration? It was called the Shepherd by the Sumarians in the earliest records we have of star-stories.  So I took a star chart of Orion and built a card around him.
We Were First

The colors actually are much richer than show in this photo. The card is in its protective sleeve which dulls it somewhat.

And the next adventure? That class that I, sadly, didn't get to take. Building small shrines from polymer clay tiles. I couldn't take the class since we were busy moving my daughter to college that weekend, but I snatched up the book and started on my own.

And that's a story for another day.

Sunday, August 29, 2010

More Dolls and Kids in College

Whew! Just finding time to breathe is a chore these days. Physically, I'm seeing symptoms that I need to slow down and regroup.  But the youngest is now in college. She and I are dealing with the separation anxiety - maybe she's dealing better than I am.  It's hard to tell. I'm finding ways to move on with my life and that's helping. I always intended that when my major child-rearing years were over, that I would branch out, learn new things, go new places. I'm starting now.


Katisha and the BJD Convention
I attended my first ever BJD (Ball-Jointed Doll) convention a few weeks ago. I was fortunate enough to meet Paulette Goodreau, the designer of my 2 MSD (1/4 size) dolls. I bought a new doll and some outfits from her. While wandering the sales floor, looking for a wig for the Goodreau doll, I chanced upon this beautiful ResinSoul Dai repaint. She came home with me to join my Elfdoll RuRu SD (1/3 size). I love the name of the antagonist in The Mikado, Katisha, although, of course, I don't love the character! So I named this doll for her, but changed the pronounciation from "KAH-ti-sha" to "ka-TISH-ah".  But she's still Kat for short. I've since changed eyes and wig on her.  I need more photos!


Raja and Her Tiger
Not too long after acquiring Sanctuary, the Sybarite in the posts below, I acquired yet another beautiful Syb - Raja. I've had such fun dressing and photographing her. First is her in a photo my husband worked on. I brought her downstairs from the studio to my computer to upload photos I'd taken. I wasn't pleased with any of them, really. Ming was asleep in his bed and I got a crazy idea to see if he would allow me to pose her beside him. Suprisingly enough, he did - he must have been very asleep!  One of my doll board friends titled this shot "Tiger, tiger in the night" and another captioned it "Be still, my pet. Mama's thinking..."  I love them both!

I made a second version of the dress featured in the post below: the dress made from an article in FDQ (Fashion Doll Quarterly) about drafting patterns from vintage fashion photographs and drawings. I loved the resulting dress, but decided to alter it and make it more exotic for Raja.  Here's Raja in a red wig modeling the result:


I finally acquired a black wig for her.  Again, I need to have another photo session with the dolls!

I think I'll close this post now, but post again soon. The art world finally opened up to me! It's been a long journey - too long in coming, actually, but I couldn't be more pleased!

Saturday, July 17, 2010

Hanging Out With the Dolls

I've had an interesting journey with dolls. I have more now than I had when I was a child!  (I think...) Definitely more fashion dolls. When I was a girl, I had baby dolls and girl dolls and a few of the requisite Barbies. My favoite was a tall, skinny, redhead who wore glasses, saddle shoes, and talked incessently. That would be Mattel's Charmin' Chatty. But when I grew up and gave away my dolls, the only girl doll I kept for my own daughter was one of the last dolls I received as a child, Baby First Step, not Charmin'.

By a long road that started when my grandmother died and I inherited the cedar chest containing my mother's favorite doll, I've learned about doll restoration, costuming and collecting. It's been an interesting road that's led me to collecting fashion dolls. Although I love the stage and love to act, I think I may have missed my calling as a costumer designer. I'm not the best seamstress in the world, but I love to design. I haven't yet had the courage to take needle in hand and design for my dolls, but I'm feeling the urge coming.

In the meantime, I'm learning to photograph my dolls, which is an adventure in itself. I've taken three photos this week that I think might do. The first photo is of my new-to-me Superfrock Sanctuary doll in a gorgeous black dress.

She almost looks real, doesn't she? The second photo is of a resin fashion doll with interchangable eyes. (This may be why my daughter says my dolls are "creepy!") This is Jamie, an Angelic Dreamz JamieShow doll wearing a gorgeous blue outfit.

The last of the three is more than a photograph. I saw the pattern for the dress in a doll magazine last fall. The article dealt with using vintage fashion photographs as inspiration for doll clothes. I decided this week to make the dress up to see if I could. There are things I'd change next time I make it, and I'd have to redraft it for a certain doll I have in mind, but yes, I can do it. The doll is a Glowing Muse doll from Robert Tonner.


So why do we collect? And why do we play with dolls? I may be answering that question for quite some time. One of my doll friends likes to collect extreme fashion dolls because the dolls can let her enjoy daring fashions she wouldn't / couldn't wear herself. Dolls let me enjoy (or get frustrated with, depending) creating fashions in rich fabrics that I couldn't afford if I were making full-size clothes. The seams are still too darn small, but I'm getting the hang of it. They let us escape for a little while into fantasy worlds. They let us try out things we couldn't do in real life.

And yes, I found a red-headed Charmin' Chatty on eBay. She lives with me now. I've collected records for her - she can still talk. I've made replacment clothes for her wardrobe and designed her a few things myself. After the 16" fashion dolls (bigger than Barbie, at least), sewing for a 22" doll is a joy! I found her an original pair of glasses. She sits on a dresser in a display of family dolls. Baby First Step is there - my daughter never did play with her. My mother's doll is there. My daughter's favorite doll is there.

Monday, June 7, 2010

Phinally Phinished Phelted Clogs (and other stuff)

Yea! They're finished! I got George's Phelted Clogs felted and they did beautifully. That's entirely by the Grace of God because I put them in the washing machine and forgot about them while I got interested in scrapbooking.  Yikes! I'm amazed they didn't turn out small enough for our youngest grandchild. But when I finally yanked them out of the washing machine, I shaped them just a bit and put them on George's feet. He's a brave man and wore them wet for almost eight hours. Although he had prune feet by the end, the clogs formed to fit his feet perfectly, and he's very happy with them. So am I!


The Once and Future Socks
I got another pair of socks finished. These poor things have been in progress for years - probably since 2006 or so. They're in Mountain Colors' Yellowstone colorway, which I adore. I started making them in the Diana's Trail Sock pattern, also by Mountain Colors. I've made lots of pairs of these socks, some for me, some for George and some for friends. They fit me fairly well, but always seeem a bit too big. I made one pair on 2.25mm needles instead of 3.0, which seemed to fix quite a few problems. However, the heel seemed too big or something, but I figured I'd just have to live with the heel. I started these one sock at a time on five double-pointed needles. Somewhere along the way, I learned to knit on two circular needles instead of the double-points. Then I discovered the joys of knitting both socks at the same time so that when I finish, I'm done. THEN I discovered Cat Bordhi's New Pathways for Sock Knitters book and made a pair from the first pattern. Hmm.... Then I got to thinking what would happen if I did the cuff from the Diana pattern, the arch expansion and heel from the New Pathways book, ribbed the instep as I learned from somewhere, but I can't even remember where now, and finally, did both socks at the same time!  So I ripped the heel back on the one sock, then set it aside while I knitted the second sock up to the end of the cuff, did the arch expansion and heel in both socks according to the New Pathways pattern and started down the foot. Somewhere about halfway down the foot I learned to knit socks by the Magic Loop method, so I put the socks on a longer 2.25 needle and finally, finally finished them this past weekend! They fit like a dream and the combined pattern is a winner. I just might have to do another pair the same way!

Celtic Braid Socks
I settled on the Riverbed Sockitecture from the New Pathways book for the arch expansion of the upside down (toe-up) Celtic Braid socks. I started the expansion today and we'll see how it goes. At the moment, they are one boring pair of socks, but if I can only get the foot and heel done, they'll get exciting soon enough.

Gale-Force Winds
We survived the huge storm last week. We were without power for several hours, but nothing like many people in town who had no power for almost 24 hours. There are leaves and small tree-bits down all over the yard, but I don't think we suffered much damage. At least I didn't think so. We've had the most interesting thing happen since. We've had an invasion of flies in the house. I've never seen such a thing. They arrived after the storm and we've spent quite a bit of energy removing them without using nasty chemicals. I think we may finally have the upper hand, but how strange!

Monday, May 31, 2010

Phelted Clogs


Ta-da! George's Phelted Clogs are finished!  Okay, I finished knitting and sewing them. Now to felt them.  I'll do that today after I finish the rest of the laundry.

Scrapping a Life, Tea and Garden Updates

Okay, so why does every craft involve lots of supplies and a large mess? At least every craft I'm involved in seems to. And I'm involved in so many that the mess seems exponential. I decided a bare two weeks before my daughter's graduation that I'd make her a scrapbook. It started out as a scrapbook of her graduation, but wait!  I have lots of memorabilia from activities that aren't technically graduation, but could be considered part of it.  Okay, I'll scrap the last part of her senior year.  But wait! How about her acceptance letters to college?  How about the photos of prom and homecoming??? Okay, those will get scrapped as well. And how about pages devoted to her best friend since seventh grade??  And I'd love to make her a "Through the Years" page like the framed displays I have of her and her brother.  Hmm... You know, a High School Years page would work.  Then I could make her a Middle School Years page.  And then an Elementary School Years page. And you know her dance scrapbook from so long ago needs a severe overhaul.  For one thing, it's in a baby-themed book and neither of us like that book. For another, I put pressed flowers on one page and quite frankly, they look awful. As I was re-scrapping the flowers page and transferring the pages into a new book, I noticed that I'd made a mistake in one year and it will need to be redone as well. And there's no journaling on the pages.  Yikes!  Stories that she either never knew or doesn't remember will disappear if I don't remedy that.

The list goes on and on.  And well it should. Where there's life, there are memories. The challenge is how to preserve the memories. During a lull in my son's bout with a kidney stone this week, we had a wonderful reminiscence session. I was amazed at how much he remembers from childhood. And then, out of the clear blue, he tells me that he thinks it's important to have lots of photos because they help him remember. Such an obvious thing, but one I tend to forget. I never want to stop to photograph the moment because I want to live the moment, but the photographs are valuable. As always, it's a balance.

However, my dining room table is very unbalanced! There are piles of scrapbook paper I've collected over the years, piles of objects d'art to embellish the pages, glue dispensers, markers, paper cutters and scissors. Boxes of memorabilia.  Scrapbooking, like taxes, isn't so hard in itself. The challenge is collecting everything to get going. I lost a day searching for school photos.  Now if somebody can tell me why I put the eleventh grade school photos in the same envelope with the fourth grade school photos, I'll be grateful. I tore up the house several times looking for them. However, everything is more organized now.  Well... except that I left a stack of scrapbook paper on a chair instead of with the main stack. Arrgghhh!! And if I only had  New York themed paper for that jazz recital...

At least there's a scrapbook store within easy reach of the house. I walked over there yesterday and managed to walk home with all my purchases - a new college-themed book, pages and pages in all kinds of themes, and two new pairs of scissors! Maybe I'd better get myself one of those rolling baskets like they use in Europe!  But then I couldn't use it when I ride my bicycle over there. But the bike has a handlebar basket that can handle (no pun intended) many things, if not a full-sized scrapbook. Perhaps that might keep my purchases in check?  Probably not.

A Garden Update
I think I'm safe in saying that all the roses but one are coming back. A few days ago, I thought all the roses were coming back, but the leaf bud Penelope started was officially pronounced dead this morning when I tended the plants. I'm afraid she won't make it. There's strong growth on most of the others, so I think with babying this summer, they'll make it. I have to admit, I'll be more aggressive in pruning the roses back next winter. The sweetheart rose collection isn't as flush as it should be and I think it will benefit from severe cutting back (at the right time of year).

The weather is getting hotter, which is stressing the plants. I've officially decided to install a drip system at least in the herb and vegetable gardens. I had one years ago and they're a wonderful alternative to hand watering.  I need to be brave and clean out the garage until I find any remaining pieces of the drip system that I can reuse.

I'm seeing an interesting phenomenon. Every morning when I go out to put peanuts in the platform feeder, I notice that the fountain fixture in the herb garden is floating in the water. I pick it out of the water, rinse off the BT granules (put there to discourage mosquitoes) and put it back. The next morning, it's in the water again. I think some creature is coming at night to drink from the fountain, although I've never seen said creature, nor does Ming ever indicate there's anything out there. Hmm... There are two new cats who seem to have taken up residence outside. One is an orange tabby and the other a black-and-tan. I think both are probably feral as they seem a bit scruffy. I saw the black-and-tan with a white wing dove in its mouth, carrying it back to the back yard. Apparently, they regard our yard as a diner. The white-wings can't easily eat from any of the feeders, but they congregate on the ground and pick up seed that the other birds drop. Oops!

Yet Another Version of Fruit-Mint Tea
This one can't legally be called fruit-mint tea since there's no mint. From the basic recipe, omit the mint and use jasmine tea instead of black tea. I love the Jasmine Pearl tea from Teavana. The green tea makes the entire drink much lighter and the jasmine scent and flavor is wonderful.  It reminds me of the iced tea from my favorite Vietnamese restaurant.

Tuesday, May 25, 2010

Buddha's Herb Garden, More Fruit-Mint Tea, and the Farmer's Market

Buddha's Herb Garden
It's funny what happens when you're looking the other way. In the aftermath of the GRM and the depression that followed, I moved several of the herbs around the fountain where the wall of roses had been. Mostly I moved them there as a temporary measure. They had been taken out of the greenhouse before our trip to Philadelphia, but just set where they'd get sun and rain. I was delighted that they made it through the winter so well, but didn't give them much more thought. One thing led to another - more peppermint in the peppermint pot, for example, and all of the sudden I looked out the French doors opening onto the deck and noticed that I had an herb garden! The last entry is the white bowl of catnip. I have a running battle with the neighborhood cats. It didn't take them long to discover the catnip when it lived on the front walkway.  The rather dilapidated plant got thrown out in the GRM, so I bought a new plant when I got the globe basil.  Sadly, Ming discovered it sitting on the counter and just about tore it up before I could get it planted. I got a second catnip plant from PetsMart yesterday and got both plants into the bowl this morning between rain showers. Hopefully, putting it in the herb garden will keep it from the notice of cats strolling by!
While writing this blog post, I got so excited about making an official herb garden that I moved one of the rosemary plants, the globe basil and garlic chives to the garden. Almost all of the herbs are there now. An Italian parsley is sharing space with an olive tree, but they're too big to move here. So... here is the final (for now) Buddha's Herb Garden!
Buddha's Herb Garden, Take 2 (left side)
And here's the herb list:
  • Spicy Globe Basil
  • Catnip
  • Lavender
  • Patchouli
  • Lemon Verbena
  • Curry Plant
  • Lemon Thyme
  • Rosemary
  • Ginger Mint
  • Peppermint
  • Garlic Chives

Fruit-Mint Tea Update
After writing my last post, I decided to try the tea with Lady Grey tea, a lighter version of Earl Grey and today was the day. I dashed out about noon to cut some peppermint - got totally soaked in the rain - and made up a batch with the Lady Grey, peppermint, lemon and lime. I also cut the sugar back to about 2/3 cup.  Okay, this is the best Fruit-Mint tea I've ever made. I'm going to try one batch with Earl Grey just to do it, but I think Lady Grey is the way to go. It reminds me of Earl's Grey Lemonade, but I think it's much better.
Farmer's Market
After over a month away, we got back to the Pearl Market on Saturday. Wow! The selection was amazing! We came home with eggplant, peppers, peaches, artichokes, onions, mushrooms, new potatoes, fresh garlic, green beans, and the prize of prizes... the first okra of the season!  Here's a sampler of what we came back with.
Farmer's Market produce
 And here's that okra!
First okra of the season
Guess who'll be making fried okra real quick??

Thursday, May 20, 2010

Garden Updates, Fruit-Mint Iced Tea, and Finishing Sweaters

It's been a week and I think I'm pretty much over the worst of the Great Rose Massacre.  George sweetly bought me a second Katy Road (Carefree Beauty) in case the original one doesn't come back and a Perle d'Or to add to the collection of small sweetheart-type roses. Thus far, two of three miniature roses have leaf buds. I'm pretty sure I'm seeing leaf buds starting on the Graham Thomas yellow rose and the Maggie red rose. Still to go are the original Katy Road, Penelope (if what I think is her is really her), the Climbing American Beauty, and the Tuscan Sun.

On the up side, we added two bougainvillas to the front wall. The last ones never did all that well, and they didn't make it through the freeze. One of these is an Afterglow, which has become my favorite variety. It changes colors from a coral red to the standard bougainvilla magenta. Since we couldn't find a second Afterglow, the second bougainvilla is a Johnson - also pretty, but not quite as nice as the Afterglow, although in the photos, it's hard to tell the difference.

Afterglow Bougainvilla

+
Johnson Bougainvilla

My goal is to keep both going through the winter. Now that the greenhouse is an  option, I think it can be done. On the herb front, I replaced the garlic chives that met their demise in the GRM and added a spicy globe basil to the mix. The peppermint survived the GRM, but was looking kind of tired out. It would probably have come back on its own, but I added another plant to the pot. Peppermint is my favorite of all the mints and I like having it around for iced tea. My fave iced tea recipe goes something like this:

Fruit-Mint Iced Tea
2 quarts water
5 tsp or 5 teabags of black tea
1 cup sugar
1 lemon
1 lime
4 sprigs mint
Bring the water to a boil and while doing so, put the tea, sugar, and mint into a heat-proof bowl. Juice the lemon and lime into the bowl and put the rinds in as well. Mash everything together with the bottom of a heavy glass.  Pour the boiling water over the mixture and leave to steep for 5 minutes. Strain the tea into a pitcher and chill. This is open to all kinds of variations. I normally use Taylor and Harrowgate's Scottish Breakfast Tea, but after trying the Earl of Sandwich's Earl's Grey Lemonade, I want to try it with Earl Grey or Lady Grey tea. I usually use whatever citrus fuit I have around. Probably ripe peaches could be substituted. I prefer peppermint, but will use whatever mint I have available. Anyway, it's very nice and refreshing on a hot day - and we're getting them now!

The Aran Cardigan


The Summer 2010 edition of Interweave Knits has a pattern for a gorgeous cardigan made of cotton-bamboo yarn.  I adore that cardigan. I want to make it. I almost ordered the yarn for it. And then I stopped... How about the gorgeous Aran Shirttail Cardigan I've had in the basket for years?  I'm finished with the body. I just need to do the sleeves. Why am I putting it off? I'm making it in Cascade's Ecological Wool yarn and either it was attacked by bugs, or had some other accident, but the reamining skeins have lots of breaks in them. The yarn spit-tricks back quite well, but I get tired of doing it all the time. I feel like I'm pasting the yarn back together. But let's face it, that's no excuse. So... I've finished both cuffs and am maybe a quarter of the way up both sleeves. (Working both sleeves at the same time helps ensure they're made the same.)

The Sleeves
(No, Ming didn't break the yarn!)

When I finally finish this sweater, I'll order the yarn for the new one!  I'm having a battle with my conscience about what kind of yarn to use anyway. The cotton-bamboo that's called for is really pretty, but there's another DK yarn in a color I prefer. But it might not hang right... Hmmm.... Or... I usually choose neutral colors for sweaters, and that soft rose is calling to me. Why not, this once, make a sweater in a soft rose? I have a beautiful shrug I hardly wear in a lovely rose shade. Why not a sweater??  But I might not like it... Is it better to play it safe and go with a neutral cream??  I think if the color is calling, maybe I'd better answer.  But for now, I'm going to finish the Aran cardigan!